This chapter describes how to interact between Revit and the DataManager. First open the sample model into the Revit and launch the DataManager. Path to sample model for Revit 2020:
C:\ProgramData\Autodesk\ApplicationPlugins\Codemill.RevitDataManager.bundle\Sample\architectural.rvt
Path to sample model for Revit 2021:
C:\ProgramData\Autodesk\ApplicationPlugins\Codemill.RevitDataManager.bundle\Sample\architectural2021.rvt

Families
If you haven't already done this, the first thing to do is to populate Revit model elements into the database. To do this press Populate Families. After the function have finished, please press also Refresh button to refresh the view.

Command populates all model elements with their categories, families and family types into the database. System families and component families are populated into the different tables and you can switch between them by selecting one from the dropdown list.

Filter Families
You can filter model elements by category, family and family type. To filter elements, please select desired value from the column headers. You can remove current filter by pressing Show all label at the bottom of the DataManager window.

Interact with Elements
When the row is mouse double clicked in the Datagrid, the plugin will find corresponding model element and will zoom to it.
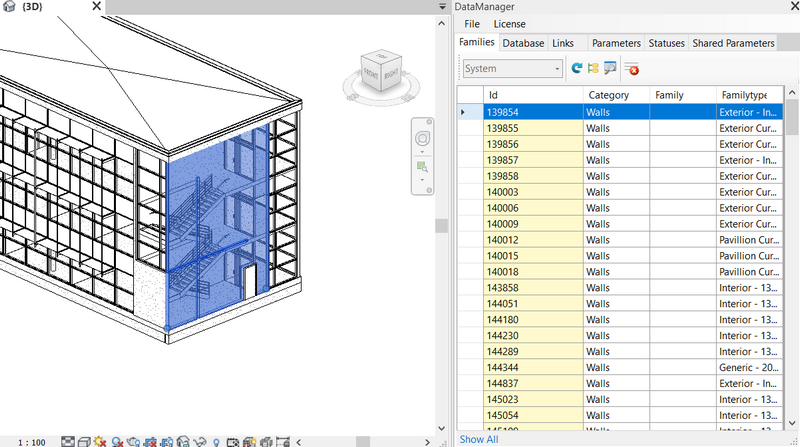
At the same time model element parameters are populated into the Propertygrid

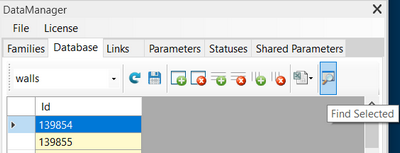
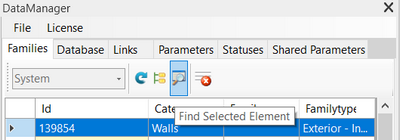
And vise versa when the model element is selected in the Revit, Find Selected Element command will find corresponding row in the Datagrid.
You can interact same way between Revit and database tables in the Database tab.
Database
In the Database Tab you can create and edit database tables, fill those with external data and link Revit model elements with them.
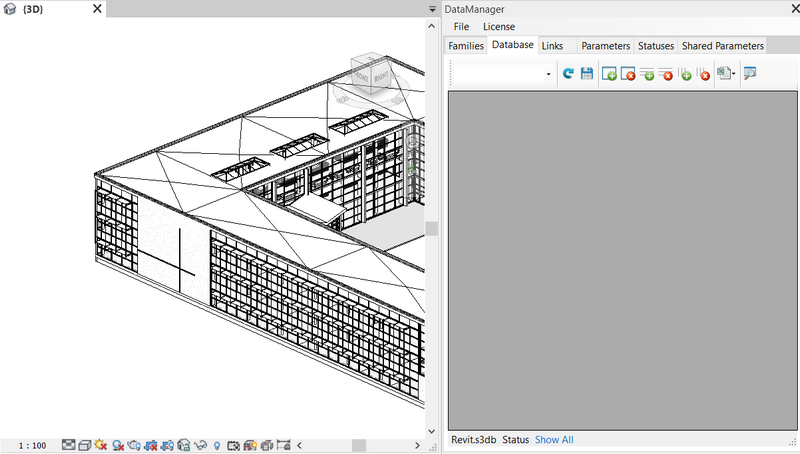

Add Table and link it with selected Model Elements
If you e.g. want to create a new table for walls, please press Add Table command and enter the name walls. After that the walls table is displayed in the DataGrid. At the moment it contains only one column (id) which is the key column.

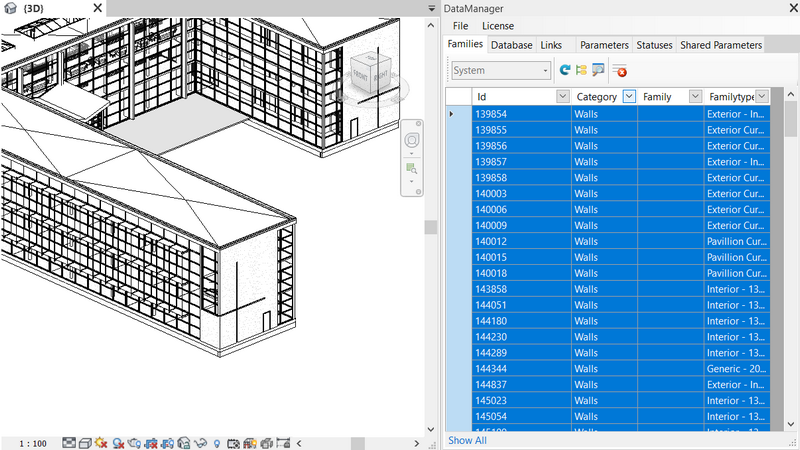
Then switch to the Families tab, filter walls and select all of them.
To filter walls, please select it from the Category header when System table is active. You can remove current filter by pressing Show all label at the bottom of the DataManager window
When have filtered walls to be included in the database, please select all rows by mouse click at the left corner of the Datagrid. Then all rows will be selected (highligted).
After that switch back to the Database tab and press Add Rows button. Then element ids of the walls are populated to the database table.

Now you can add more columns to the database, import and export data from the excel spreadsheets and create hyperlinks and status information for each model element as well as create shared parameters directly from the database information.
Interact with Elements
When the row is mouse double clicked in the Datagrid, the plugin will find corresponding model element and will zoom to it.

At the same time model element parameters are populated into the Propertygrid
And vise versa when the model element is selected in the Revit, Find Selected Element command will find corresponding row in the Datagrid.